

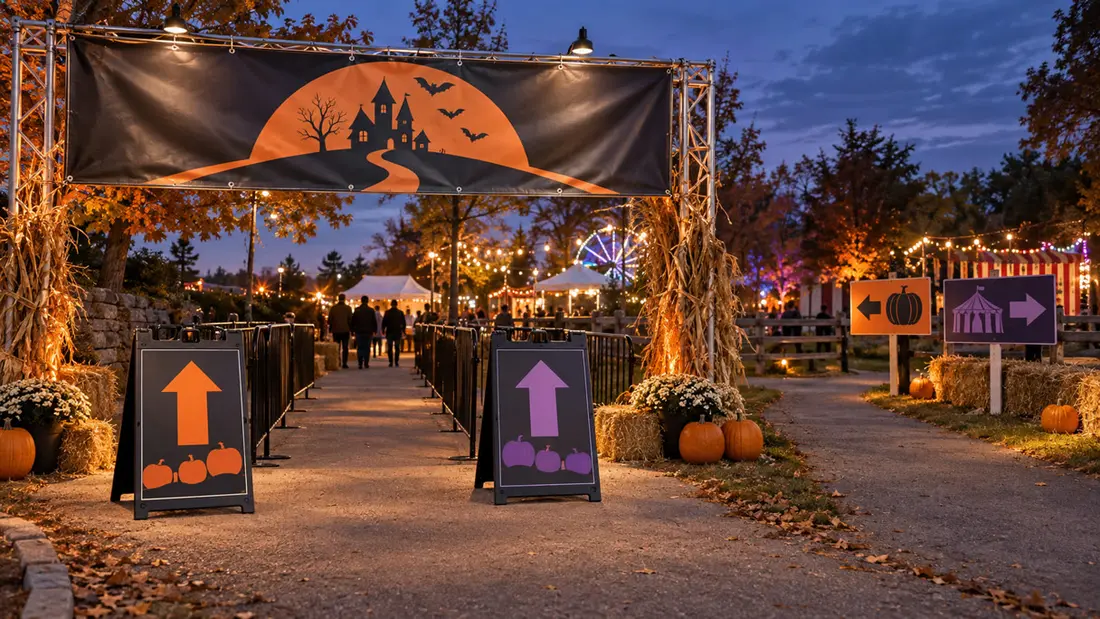
What signs do Halloween events need? Start with the route. Mark every place visitors choose a direction or need confirmation they've arrived, from the entrance and ticket queues to activity turns, restrooms and departure. Use vinyl banners as visible landmarks, Coroplast panels for fixed directions and A-frames where queue openings may move.
What signs do Halloween events need? Count the placements
Draw the venue before counting signs. Mark pedestrian approaches and the gate, then follow the route through ticket collection to each path junction. Attendance alone won't tell you the quantity. A small event with several turns can need directions at every one.
Consider this hypothetical layout: two pedestrian approaches meet at one gate, where visitors choose prepaid check-in or ticket purchase. Both queues lead to a shared admission point. Beyond it, a fork serves a pumpkin patch, games area and haunted attraction. Restrooms sit off that route; departure uses a separate exit.
That route uses two banners, nine Coroplast panels and three A-frames. The panels cover two arrival approaches and seven placements inside. Count venue-required signage separately. Extra decision points also need their own count.
How will visitors recognize the entrance?
Place one direction panel on each pedestrian approach before the turn toward the gate. Both can read “Halloween Event Entrance,” but check each arrow at its actual location. Two approaches need two placements. A panel facing one path may be invisible from the other.
At the gate, a vinyl banner, from $67.00, provides the arrival landmark. Give the event name and “Entrance” the strongest emphasis, with sponsor blocks and decoration secondary. Visitors need to recognize the gate from farther away.
Measure the mounting space first. Choose banner dimensions for that space and the viewing distance, then settle the finishing and secure attachment method. Don't assume a fence, school wall or temporary structure can accept the fixing you have in mind.
Where should ticket and check-in signs go?
Put the first A-frame before the ticket lanes divide, answering “Already have tickets?” Direct visitors to “Prepaid Check-in” or “Buy Tickets.” Match the booking instructions exactly. A new name at the gate gives visitors another thing to work out.
Place the second A-frame at the prepaid queue opening and the third at the purchase queue opening. Each confirms the lane and explains the next action, such as “Have your booking confirmation ready.” If visitors collect wristbands or activity tickets here, say so.
An A-frame sidewalk sign, from $94.99, can move with the queue opening. Keep it outside the walking line and confirm that its support suits the site conditions. Plan both viewing directions separately. A double-sided display needs artwork that makes sense from each approach.
The second banner identifies the shared ticket and check-in area beyond those openings. If timed admission creates another choice, add directions before visitors join a queue. Put relevant participation restrictions before ticket purchase, too. Visitors need that information before paying.
Which panels belong beyond admission?
At the activity fork, use one directory panel showing all three destinations with their arrows. Place a separate identification panel at the pumpkin patch, games area and haunted attraction. The directory tells visitors where to go; each destination panel confirms they've arrived.
Coroplast panels, from $23.79, are a lightweight corrugated plastic option for fixed temporary signs. Specify how each panel will be supported, such as fence attachment, a holder or compatible stakes. Check the ground conditions early. Staking isn't available at every location.
Restrooms need two panels in this sample: one at the turn off the main route and one at the destination. A visitor exit direction panel goes where the departure route separates. These make seven interior panels, plus the two arrival panels. The visitor exit panel doesn't replace venue-required emergency signage.
Adjust the count to your layout. Remove destinations that don't exist at a smaller school fundraiser; add a direction panel for another path junction at a larger patch. For movable signs sharing space with pedestrians, use the A-frame placement guide.
What sizes and finishes should you order?
Choose sizes from the viewing position, available mounting space and amount of copy. There isn't a stated dimension for this sample route. Walk each approach to see where visitors must read the message, then record finished dimensions for every placement before requesting a quote.
Specify finishes alongside the attachment method so the printer knows how you intend to install each sign. For cost planning, give the estimator quantities, dimensions, printed sides and finishing requirements. Treat the listed prices as starting prices. They aren't a quote for the complete sample order.
Can visitors read the signs before deciding?
Check each sign from the point where a visitor must choose a direction, allowing for parked vehicles, decorations and standing queues. Test different eye heights, including a seated position. The arrow must be readable before the turn, not just beside it.
Keep the message visually simple. Use strong contrast and uncomplicated lettering, with space around directions. Distressed lettering and busy illustrations can make the route harder to follow. If a destination isn't clear, shorten the copy or give it more prominence before adding decoration.
Repeat the walk after sunset with event lighting operating. Ordinary printed banners and panels don't illuminate themselves, so light must reach each face. Check for glare and deep shadows, including colored lighting that reduces contrast. Visitors shouldn't need a phone flashlight to read directions.
Test with people in the queues. Inspect both approaches to double-sided displays, then adjust placement or lighting and check again. A daytime proof can't establish nighttime readability.
How should you prepare the worksheet and artwork?
Record each placement separately, including its exact wording and arrow direction. Add finished dimensions, printed sides, attachment details and available lighting. Count physical units separately from artwork faces. A two-sided sign is still one structure.
Your worksheet should account for the two arrival panels and entrance banner, followed by the A-frame before the ticket split and one at each queue opening. Record the shared ticket-area banner where both queues can see it. Match its wording to the admission process.
Beyond admission, record the directory and three activity identification panels, then the two restroom panels and visitor exit panel. Verify directory arrows on site. Destination names should match their identification panels, and the venue should confirm the departure route.
For file setup, identify which artwork belongs to each location and viewing face. Confirm the printer's file requirements before export, including bleed, safe margins and image resolution. Proof arrows against the placement drawing. Identical wording doesn't mean identical artwork when signs face different approaches.
Before ordering, ask the organizer or venue manager to confirm placement and attachment requirements, accessible routes, emergency information and any additional signs. Bring the confirmed worksheet to Angels Print at 8511 Lankershim Blvd, Sun Valley, CA, use our event signage service, or order online. If the route is settled but the artwork needs work, start with custom sign design.
Frequently asked questions
How many signs does a Halloween event need?
Count placements along the visitor route, from arrival approaches to queue choices and destinations. This sample needs two banners, nine Coroplast panels and three A-frames. Your layout determines the count. Viewing directions and venue requirements can add signs; attendance alone doesn't settle the quantity.
What signs should go at a Halloween ticket booth?
Identify the shared ticket area and direct visitors toward prepaid check-in or ticket purchase before the queues split. Confirm each lane at its opening. Explain what visitors need ready and where they'll collect wristbands or activity tickets, using instructions that match your admission process.
Are Coroplast signs suitable for a pumpkin patch?
Coroplast panels can provide temporary arrival directions, activity labels and route markers. Choose dimensions for the viewing distance. Before printing, confirm the support method, including stake compatibility where applicable, and check the available mounting surfaces and site conditions.
How do you make Halloween event signs readable at night?
Use strong contrast and simple lettering, then test after sunset with event lighting operating. Ordinary printed signs need light on their faces. Check shadows and glare at each decision point, with people in the queues, and adjust placement or lighting before opening.